

Justin Pava, Software Release Manager, and Jeanie Conner, Software QA Engineer, at Laserfiche share some tips on security, fields, reporting and more.
Security
Security is a vital component of administering your Laserfiche system. Always set up security by group, even if it is a group of one, in order to make it easier to adjust the settings if people decide to leave the organization or if additional people are hired.
In Laserfiche, you can set up either Laserfiche groups or use your existing Windows Active Directory groups. We suggest using a combination of both of these groups to refine security.
Use Windows Active Directory groups to determine what should be accessible:
- Human Resources Group
- Sales Group
- Accounting Group
Use Laserfiche groups to determine roles:
- User
- Manager
- Administrator
Example: Your organization has various Active Directory groups for different departments such as Sales and Accounting. Within these departments, employees have different job functions. You can use these same Active Directory groups in Laserfiche, and apply security to them. That way, users in the Sales group can only view the Sales part of the repository, etc. Let’s say you would like all of the managers in all of the departments to perform different functions in the repository than the other users. Managers may be the only ones who can delete documents, for example. By creating a separate Manager’s group in Laserfiche, and adding all of the managers to that group, they will then be able to inherit the security from their departmental Active Directory group, while also having the special roles and privileges from the Manager’s group. In this way, you will have a Sales Manager who differs from an Accounting Manager, etc.
Note:
- Use the Laserfiche Account Conversion Utility to easily migrate from using Laserfiche users to Windows users.
- Everything described above is also applicable to LDAP.
Dynamic Fields
Dynamic fields allow you to constrain the values in one field based on a value set in another. The most common way of specifying which sub-values (child values) are valid for which parent values is by populating tables in an external database and then specifying which Laserfiche fields in the template correlate with the external table values. Here is a quick and easy method to create a new SQL table from a Microsoft Excel spreadsheet.
Note:
- Unless you have administrative privileges on the external database, a DBA would have to do this process for you. Simply hand your DBA the spreadsheet and s/he won’t have to manually input the data into the database.
- This process is only possible with a Microsoft SQL Server database.
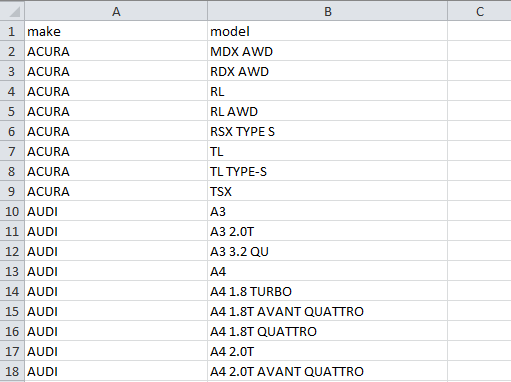
1. Create a spreadsheet that has the table column names in the first row and the data that goes in those columns in the rows directly following the first row. Here is an example of a table listing the make and model of various cars.
2. Open SQL Server Management Studio.
- Right-click the main database node and select Tasks and then Import Data.
- The Data source is Microsoft Excel. Browse to the Excel file you want to import and then select the version of Excel. Check the First rows has column names box.
- Choose the Server name and the Database into which you will be importing the file.
- Select Copy data from one or more tables or views.
- Select the specific sheet in the Excel file where the data that you are importing is located and click Preview.
- Click Next until you get to the final screen and then click Finish.
Once you’ve set up the external table using the method described above or any other method you of your choosing, go ahead and register your table in the Administration Console. Then add your dynamic fields to your template.
Note: Dynamic fields are not limited to Microsoft SQL Server, only the process outlined above about creating a new SQL table from an Excel spreadsheet is limited to Microsoft SQL Server.
Exporting repository objects
You can export various repository objects into an XML file that can then be imported into any other repository.This feature is useful for creating a standard Laserfiche setup when it is not possible to import the items using a briefcase. Anything that is created in the Administration Console can be exported, including :
- Records Management objects.
- Fields/templates.
- Users/groups.
Note: Export these objects on the node in question and import them at the main repository node.
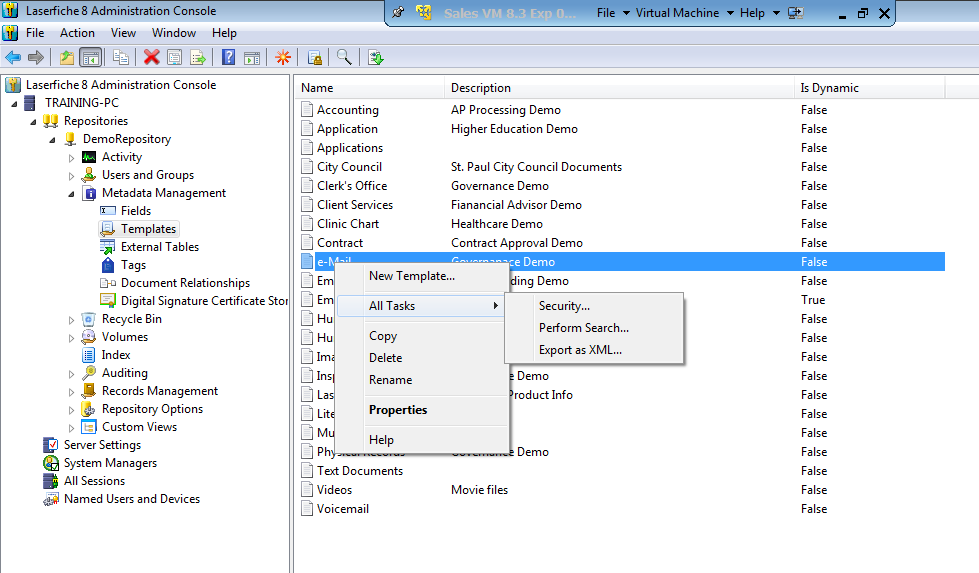
To export objects, open the Laserfiche Administration Console and navigate to the object you’d like to export, such as a particular template. Right-click on the object name and select All Tasks then Export as XML.
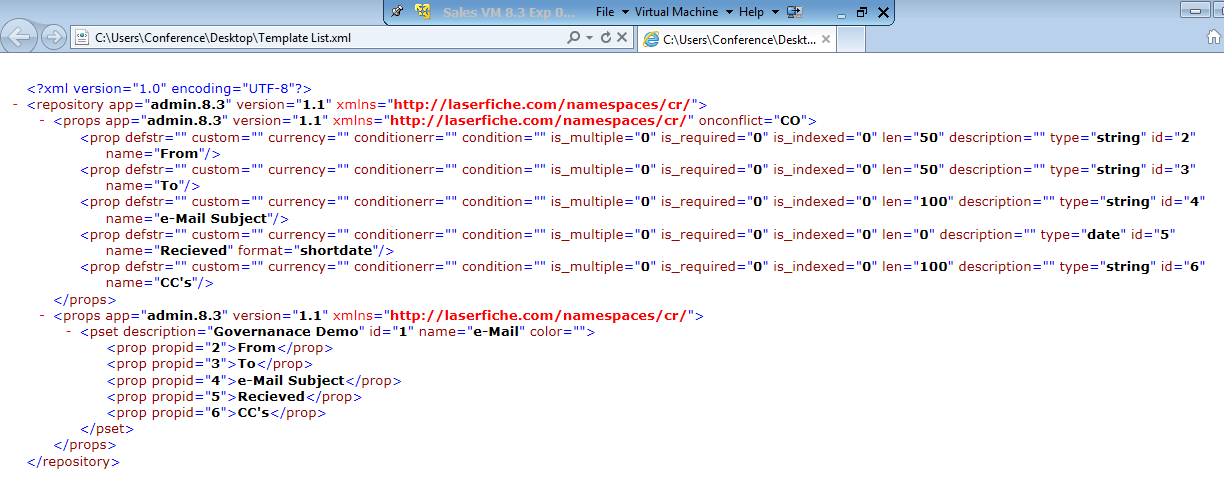
Select where you would like to save the file and then click Save. Once you open the file, it will look similar to the one below.
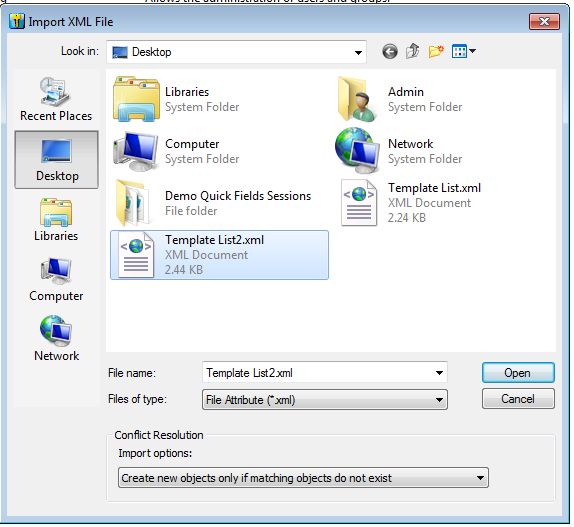
To import objects, right-click on the desired repository in the Administration Console, point to All Tasks and select Import Repository Objects. In the new window, browse to the XML file you are importing and select one of the following from the Conflict Resolution section:
- Create new objects only if matching objects do not exist.
- Always create new object.
- Only update existing objects (do not create new objects).
- Update existing objects or create new objects.
More detail about each of those options can be found in the Help Files.
Formatting fields
Starting with Laserfiche 8.2, number fields can now be formatted in many different ways, including as Currency.

You can select any currency that you like. Once that particular field is populated, it will also show up correctly formatted in all field views in the Laserfiche Client. Sorting the column with the currency field will now sort the entries there as numbers not as text.

Date, Time and Date/Time fields can also be formatted in similar ways.
Speed up working with documents
Once you’ve configured a search that you think will be useful later, save time setting it up in the future by saving it.
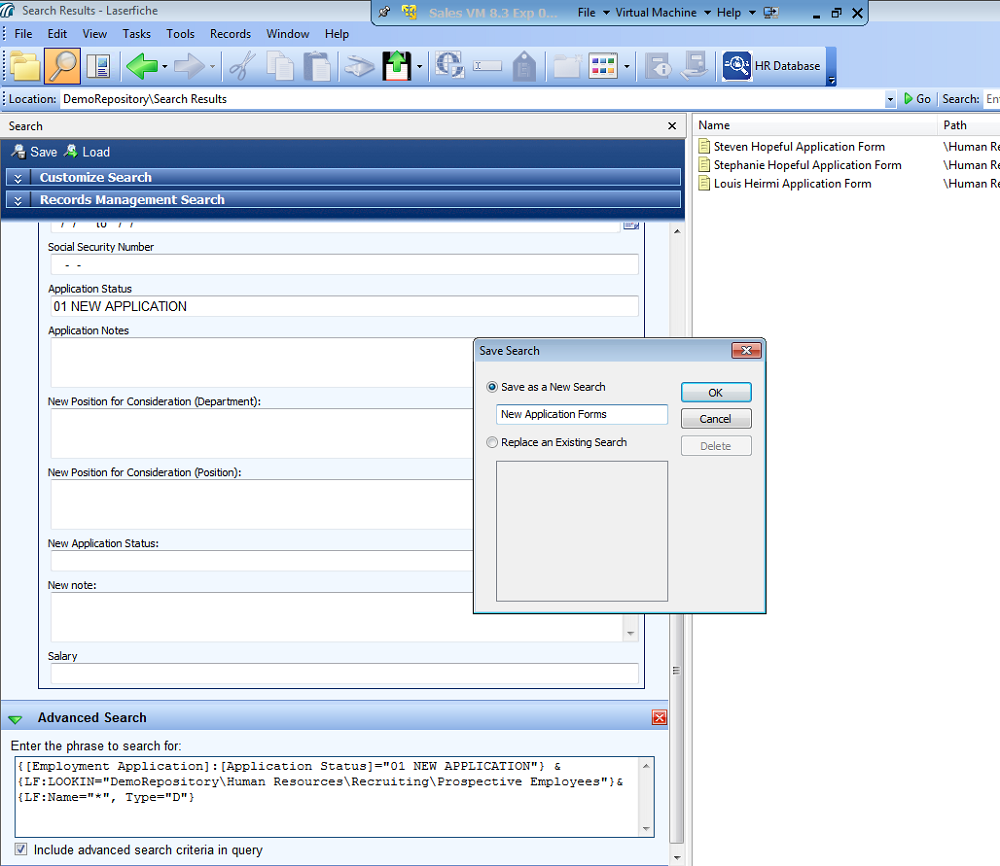
When you need to run that particular search later, all you have to do is click on Load and select the saved search.
Speed up sorting documents in a folder based on any column set by utilizing the new “save column profiles” option in Laserfiche 8.3. In this way, you can have different pre-saved views for the same folder and quickly switch between them.
In Laserfiche, page thumbnails are generated the first time that a document is opened. These thumbnails are then cached and do not need to be re-generated every time the document is opened, but during the actual thumbnail generation process, documents may load slowly. Enable the generation of thumbnails in the background to create thumbnails for all old documents and any brand new document that is added to the repository at once, before they are even opened.
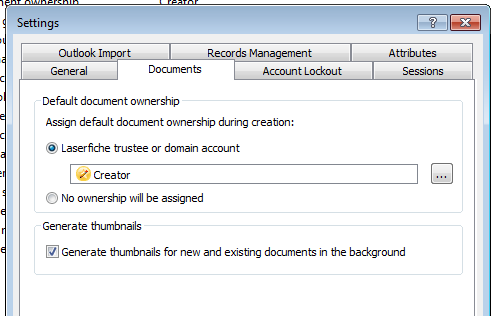
Note: This feature should only be enabled if you find documents are loading too slowly the first time you open them.
Migrate a physical volume to a logical volume
Laserfiche supports two different types of volumes: physical and logical. A logical volume is a collection of physical volumes. Implementing logical volumes is a best practice for the following reasons:
- If one physical volume that comprises the logical volume runs out of space, a new one will automatically be created. Users won’t know they are working with another volume.
- Smaller physical volumes are much easier to back up.
If you have one large physical volume, and would like to split it into smaller physical volumes in order to create a logical volume, you can do so with this quick and easy method.
- Create your new logical volume in the Administration Console.
- Perform a search for all of the documents on the physical volume from which you are performing the migration.
- Sort the search results by date created.
- Select all. Click on Tasks – Migrate Entries.
- Select your destination volume and click OK. As each new physical volume comprising the logical volume fills up, a new one will be created.

Note: This method only works if you set up the logical volumes to roll over by size not by a specific date.
Simplify Laserfiche search
Follow these steps to be able to search Laserfiche through the search option in your Web browser.
- Log into Laserfiche Web Access
- Click on the arrow next to the search box in your toolbar.
- Select “Add Laserfiche.”
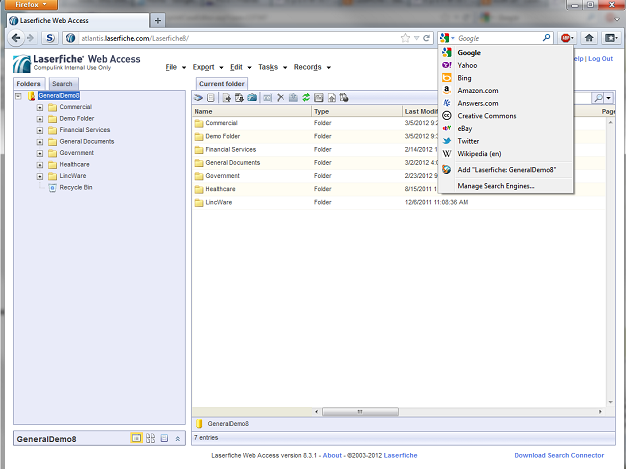
From now on, if you would like to search Laserfiche without opening Web Access, you can just select Laserfiche from your search providers and type in your search terms.
Note: This search uses same settings your user has set for Quick Search. This is compatible with most Internet browsers.
Load Audit Trail reports
In order to generate audit trail reports from other applications such as Web Access, you can load Audit Trail reports with a single URL. This will allow you to share audit reports with other audit users who have permissions to build reports.
The root Audit Trail Report URL is as follows:
http://servername/AuditTrail8/reportlink.aspx?repo=repositoryname
Servername refers to the computer where Audit Trail is installed and repositoryname references the name of the repository on which you want to run a report (this is case-sensitive).
You can update the URL syntax to filter by:
- Event Type
- Columns Displayed
- Date/Time
- Time Zones
A full list of the syntax that can be included in Audit Trail Report URLs can be found in this whitepaper.