Jacob Seene, Software Engineer at Laserfiche, walks through some tips and tricks that will help you get the most out of Workflow 8.3.
Workflow is a very efficient tool that helps automate and improve various business processes. Workflow 8.3 offers numerous enhancements over the previous version. Here are some tips and tricks to help you get the most out of some of those new features.
Select activities quickly
With more than 60 built-in Workflow activities to choose from, you can use the following tips to quickly find the specific activity you need:
- To search for an activity, use any part of the name or a keyword related to that activity in the Toolbox search field:

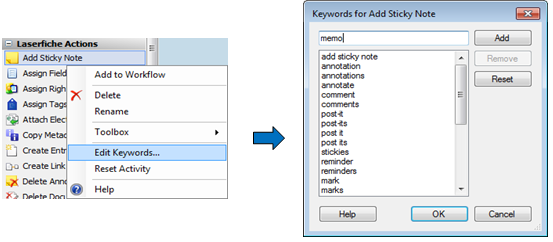
- You can even view and edit the list of keywords that pertain to each activity. Simply right-click on the activity name and select Edit Keywords.


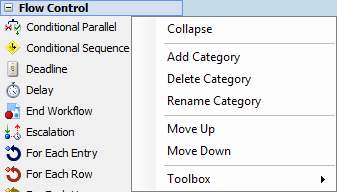
- To add, remove, rename and reorder categories, right-click on the category name and choose any of the following options:


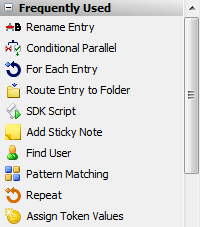
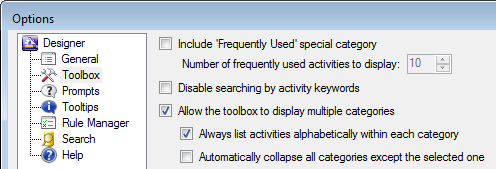
- Use the “Frequently Used Activities” category to quickly find the activities you use most often.


- Decide whether to include the “Frequently Used” category by checking the appropriate box in the Designer – Toolbox – Options menu. While there, you can also change the way activities are listed within each category.


Configure your activities
Once you have selected the activities you want to use, make sure you configure them correctly.
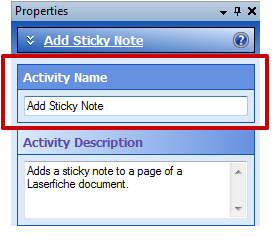
- One of the most important steps in configuring activities is accurately naming them. Intuitive names can help:
- Convert your business process into a workflow. It will be easier to see how your workflow correlates with the existing business process you are replicating.
- Keep track of what parts of the business process you’ve modeled.
- Ensure that others understand your workflow.
To rename Workflow activities, simply select the activity’s Properties and change the Activity Name.


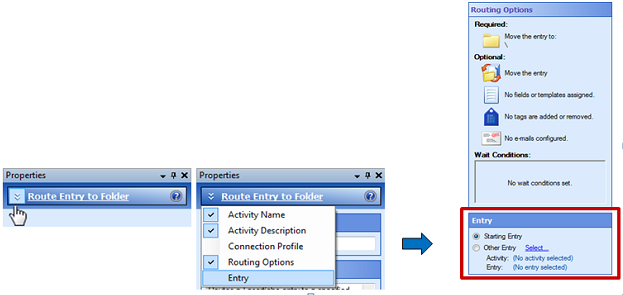
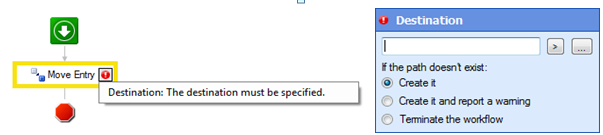
- Some activities, such as “Route Entry to Folder” and “Route Entry to User”, have additional properties that are initially hidden. You can select them from the menu that appears when you click the white arrows at the top of the Properties pane.


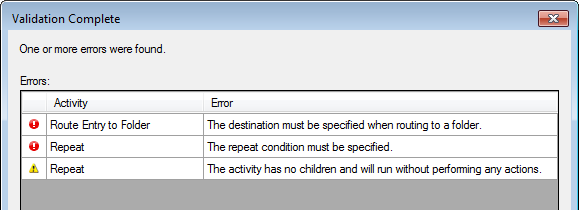
- If you haven’t configured your activity completely, you will see a validation icon. If you click on the icon, you will see details about what needs to be fixed. The icons will lead you to the source of the problem.


- Your workflow will also be validated before it is published.


- Don’t ignore warnings that appear in this window. Not addressing these errors will cause your workflows to not work properly or to fail.
- To go to the error in the workflow, double-click on the problem activity.
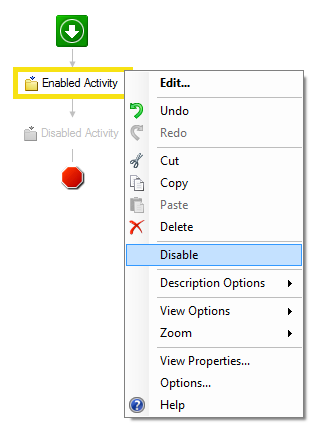
- You may also disable certain activities when you want to publish an unfinished workflow. This is helpful for testing part of the workflow while disabling activities that you don’t want to run or that contain errors.
- You can do this by right-clicking on the activity you want to disable.


- You can do this by right-clicking on the activity you want to disable.
- If you make mistakes, you can always use the undo/redo functionality in the Designer Pane, Rule Manager and Condition Editor to undo them.
- By clicking on the small black arrow next to the undo/redo buttons, you’ll pull up a history of the actions you’ve taken. From there, you can undo/redo more than one event at once.


- By clicking on the small black arrow next to the undo/redo buttons, you’ll pull up a history of the actions you’ve taken. From there, you can undo/redo more than one event at once.

Use tokens optimally
Tokens can be very helpful in configuring your activities by acting as placeholders for information that will be available when the activity runs. Here are a few suggestions for optimizing your use of tokens in Workflow 8.3.
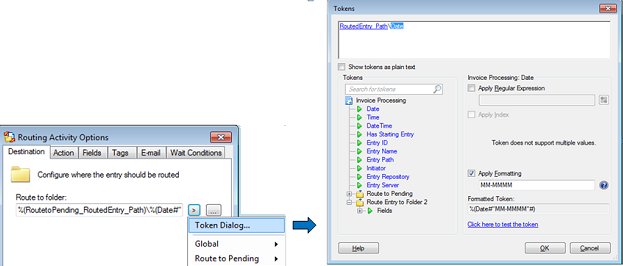
- You can use the Token Dialog menu to add, remove and format multiple tokens for the same text box all in one place.


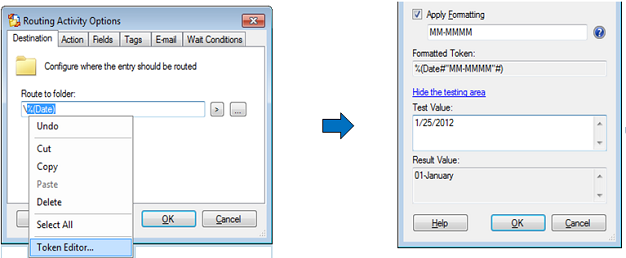
- You can format tokens to display their values differently. For example, instead of the full date, you can format the token to display the month only. You can also test the formatting by inserting a Test Value and then looking at whether the Result Value returns what you expect.


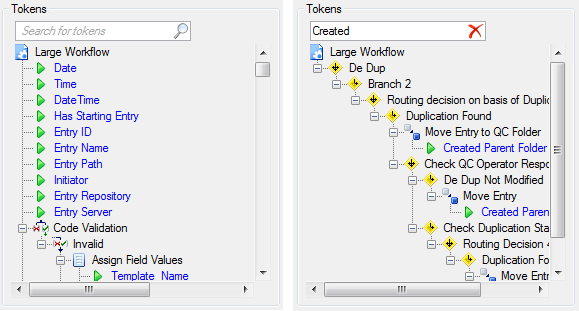
- To quickly find the token you are looking for use the Search for Tokens option in the Token Dialog.


- To easily validate your tokens, look for the red underline. The token will be underlined in red if there is an error associated with it. Right-clicking on the token will tell you what is wrong and/or provide a list of suggested replacements.


Organize your workflows
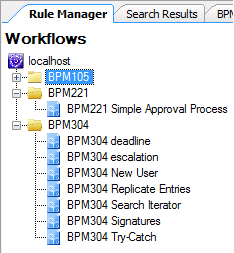
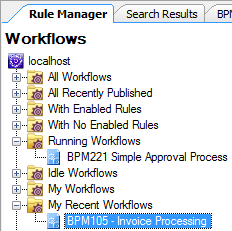
Once you’ve published your workflows, organize them using the Rule Manager.
- To do this, you can store your published workflows in different folders.


- Certain special folders are automatically populated with workflows based on a variety of factors, such as “My Workflows,” “All Recently Published,” etc.


Present your workflows to others
Discussing your workflows in a meeting is easy, thanks to the following features:
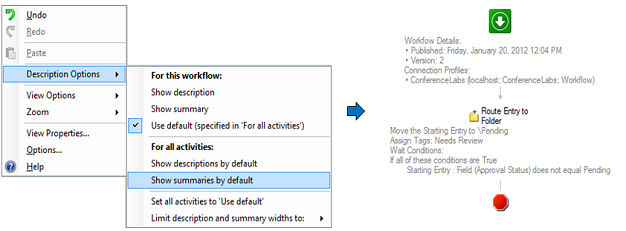
- To show a summary of each activity’s configuration settings in your workflow, choose “Show summaries by default” from the “Description Options” context menu.


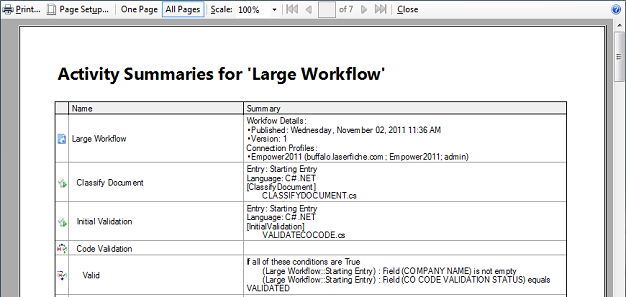
- You can also print activity summaries as a table and then cross-reference them with the workflow canvas. In the Workflow Properties dialog, select the Summary tab, check “Display as table” and then click Print.


- In addition to activity summaries, you can print the following:
- Workflows
- Starting rules
- Search results
- Reports and graphs